Summer project turning into a winter project?
Alright, it is time to be honest I guess. I did actually think that I would be able to create an espresso brewing focused scale from scratch (and scraps) over the summer vacation while everyone else in the family was sleeping (i.e. working the night shift).
Well, I didn’t make it and that’s how it is and I hope that shedding some light on the project (through a couple blog posts) might push me the extra mile for actually finishing it before winter vacation arrives….
Time will tell! :-)
Background
Ever since I got myself a Cafelat Robot which is a really awesome piece of hardware from coffee perspective while also being aesthetically pleasing, I haven’t been able to time my shots since there is simply no space for my current scale except when I turn it 45 degrees which feels a bit wonky having the scale sticking out while brewing and it also lacks an auto-start function for the timer (or I lack a third hand to start the timer while pulling the shot).
I did look at some off-the-shelf scales but I didn’t want to spend that amount of money so instead I, just before summer vacation started, went through some of my good-to-have-to-make-something-with-later boxes and I managed to find;
- Arduino Nano
- Load cell rated for max 1 kg (from an old cat feeder project)
- HX711 based amplifier
That’s it, I’m going to throw together my own simple scale….or so I thought at least.
Initial acceptance criteria
- I want to be able to start pulling a shot on the Robot and the timer auto-starts when the scale reaches a predefined load.
- I want to have the possibility to calibrate the scale using a known weight.
- I want to make use of some of left-overs switches and keycaps from the mechanical keyboard that I built.
- I want the scale to be a nice fit (i.e. fit in-between the legs of the Robot).
- I want the whole thing to be designed by me - CAD challenge accepted!
First retrospective
- All things take more time than anticipated, especially the CAD part since I’m just starting to dip my toes in that domain.
- If project involves wiring, pcbs etc. then build a draft/development casing for the product early in the project to ble able to protect the inner and sometimes delicate stuff of the product from toddler drive-bys, curious cat and what not.
- (For the faint of heart, I never leave wiring hot nor connected to power)
A first glimpse

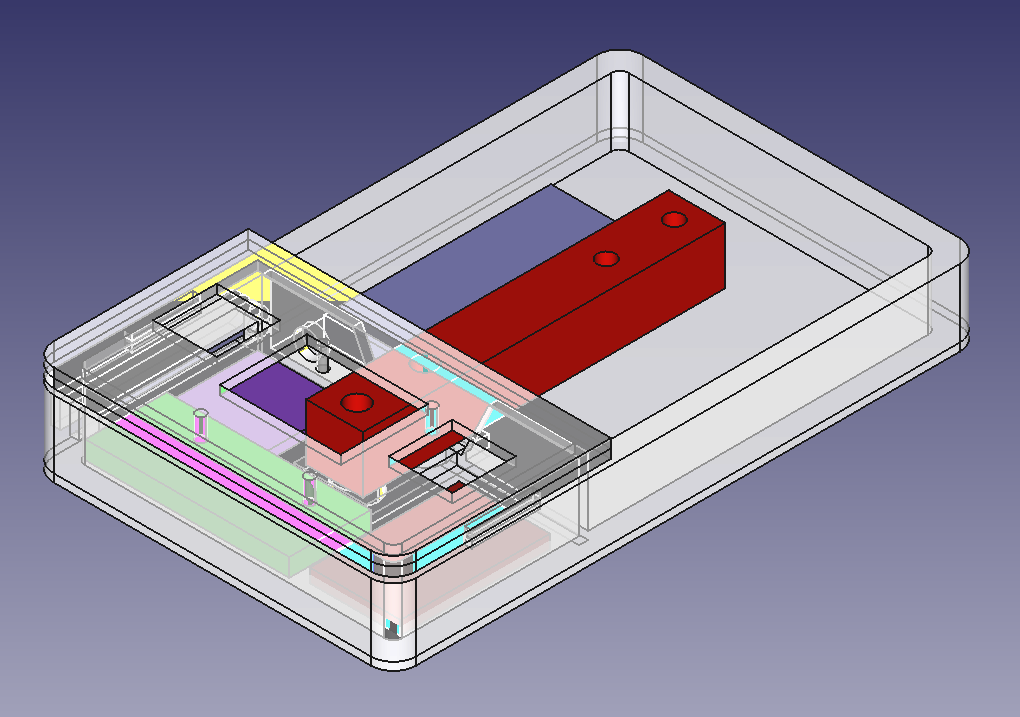
(As the noob I am when it comes to CAD I also modelled placeholders for PCBs, load cell, battery etc. just to make sure everything fits nicely.)
Next up
Finishing the draft of the initial version of the casing and print it out and from there take up the firmware side of the project again (where I started the project). It is a roughly a 7 hour long print at 0.15mm layer height, so to keep print(s) to the very minimum I have to be thinking at least twice before sketching out the last bits.
In short, next post should project a scale with a working display and two buttons that can navigate/control the states/modes in the firmware. Not saying the modes shall be working though. ;-)
Parts list
New parts: